A blog discussing sensors and instrumentation. New products, new technologies, and interesting applications. Types of sensors and instruments discussed include: Analyzers, Color Sensors, Displacement Sensors, Flow Sensors, Industrial Weighing, Instrumentation (Data Acquisition), Load Cells & Instrument Hardware. Machine Controls, Pressure Gauges, Pressure Sensors, Sanitary Sensors, Strain Gages, and Temperature Sensors. Courtesy of AP Corp.
AP Corp. Voices Support for Israeli Friends & Colleagues
High-Speed Color Measurement for Modern Manufacturing
(508) 351-6200
https://a-pcorp.com
From Spot Checks to Cumulative Assessments: Understanding Noise Measurement Tools for OSHA 1910.95
The Occupational Safety and Health Administration (OSHA) is an agency of the United States Department of Labor, and it is responsible for ensuring that employers provide safe and healthful working conditions for employees in the U.S. One of the ways OSHA accomplishes its mission is by setting and enforcing standards.
OSHA standard 29 CFR 1910.95 relates explicitly to occupational noise exposure. This standard protects workers from excessive noise levels that can lead to hearing loss or other health problems.
Sound level indicators (often called sound level meters or SLMs) and dosimeters are two primary instruments used to measure occupational noise levels. Both devices help employers assess noise exposure and ensure compliance with OSHA's 1910.95 standard on occupational noise exposure.
- Sound Level Indicators (Sound Level Meters - SLMs):
- Function: An SLM measures sound pressure levels in the workplace. It provides instant readings of noise levels at a specific location and time.
- Usage:
- SLMs spot-checks or short-term measurements in specific areas or at particular workstations where noise levels might be a concern.
- They can identify areas in the workplace where further noise monitoring or controls may be necessary.
- When using an SLM, it's crucial to consider the weighting scale (typically "A" weighting for human hearing) and the response time (slow or fast).
- Data Collection: SLMs provide a snapshot of the noise level during measurement. They don't offer cumulative exposure data over time. Therefore, while SLMs can determine if a particular location is loud, they don't indicate the length of exposure to that noise level.
- Dosimeters:
- Function: Dosimeters are wearable devices that measure a worker's cumulative noise exposure over time. They provide a personal noise dose reading based on the intensity and duration of sounds for individual exposure.
- Usage:
- Dosimeters are typically clipped to a worker's clothing and worn throughout the workday. The microphone is usually positioned near the worker's ear to assess the noise exposure accurately.
- They benefit workers who move between different areas or tasks, resulting in varying noise exposures.
- Data Collection: Dosimeters continuously measure and record noise levels, providing a time-weighted average (TWA) over the period worn. This data is crucial in determining worker-level exposure exceeding permissible exposure limits (PEL) set by OSHA or other regulatory bodies.
Compliance with OSHA 1910.95:
- Employers typically start with sound level meters to identify areas or tasks with potentially hazardous noise levels.
- Employers will use dosimeters to monitor individual exposures over the work shift if areas show elevated noise or workers' tasks involve moving between varying noise environments.
- Suppose the noise levels exceed the action level (typically 85 dBA TWA over 8 hours). In that case, the employer must implement a hearing conservation program, which includes further monitoring, audiometric testing, training, and provision of hearing protection.
In summary, while sound level meters provide immediate spot readings of noise levels, dosimeters assess an individual's cumulative exposure over time. Both tools are essential for comprehensively evaluating workplace noise and ensuring compliance with occupational noise standards.
(508) 351-6200
https://a-pcorp.com
Optimizing PCB Testing with the Latest 3-Element Stacked Rosette Strain Gauge Technology
- Quality Control: During the manufacturing of PCBs, there may be internal stresses generated due to various processes such as lamination, soldering, etc. These stresses may lead to the PCB's warping, bending, or even cracking. Stacked rosette strain gauges can measure these internal strains at critical points on the PCB to ensure they are within the permissible limits.
- Design Validation: During the design phase of PCBs, engineers use finite element analysis to model and predict the strains and stresses that the PCB will be subjected to during its operation. By attaching stacked rosette strain gauges to the prototype PCBs and subjecting them to real-world operating conditions, engineers can measure the actual strains experienced by the PCB and compare them with the predicted values from the model, helping in validating the design and making any necessary modifications before mass production.
- Failure Analysis: When a PCB fails during operation, it is essential to understand the cause of the failure to make necessary design modifications and prevent similar failures in the future. Stacked rosette strain gauges can be attached to the PCB at locations suspected of experiencing high stresses or strains. By subjecting the PCB to the operating conditions that led to the failure, engineers can measure the strains at these critical points and determine if they were the cause of the failure.
- Thermal Expansion Measurement: PCBs often have components that generate heat during operation, which can cause thermal expansion of the material. This thermal expansion can lead to mechanical stresses and strains on the PCB and its components. Stacked rosette strain gauges can measure these strains accurately and help design PCBs that can withstand these thermal expansions without failure.
Micro-Measurements' G1350A Features:
- Round shaped to facilitate spot installation.
- Minimal form factor of 5.1mm diameter.
- Readily available resistance values: 120 ohm (C4A) + 350 ohm (C4K).
- Flex circuit connection for the most flexible and comfortable gage installation (50mm and 300mm).
- Pre-attached lead wires: 1m or 3m length, 2 or 3 wire configuration.
- Highly compatible with StrainSmart® software for PCB testing application features.
4Sight2 from Druck - Easy-to-Use, Cost Effective and Scalable Calibration Management
- Error proof & time saving calibration management
- Up to 40% cost savings
- Asset management tools
- Calibration certificates, compliant and audit-ready data
- Fully paperless and traceable
- Truly global in multiple languages
https://a-pcorp.com
(508) 351-6200
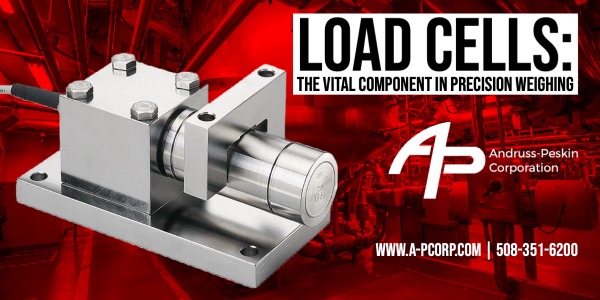
Load Cells: The Vital Component in Precision Weighing
Breathing New Life into Aging Machinery: Reconditioning and Modernizing Your Plastic Injection Molding and Extrusion Equipment
Reconditioning of plastic injection mold and extrusion machines is a process that involves restoring or upgrading the machine to improve its performance, efficiency, and lifespan. This process can include replacing worn-out or outdated components, updating control systems, and enhancing the overall functionality of the machine. Key elements to consider for reconditioning are control systems, HMI (Human-Machine Interface), pressure sensors, temperature sensors, and feed screws. Here's a list of items to consider when reconditioning these machines:
- Inspection and assessment: Begin by thoroughly examining the machine to identify worn-out or damaged components, as well as outdated control systems and sensors. This assessment will help you determine the necessary upgrades and replacements needed.
- Disassembly: Carefully disassemble the machine, taking note of the locations and orientations of each component for reassembly later. Clean each part to remove accumulated debris and contaminants.
- Control system replacement: Remove and replace the existing control system with a modern, programmable system that offers improved performance and efficiency. This new system should be compatible with existing hardware and allow for seamless integration with the machine.
- HMI upgrade: Replace the old HMI with a modern, user-friendly interface that simplifies machine operation, monitoring, and control. This new HMI should be compatible with the updated control system and provide enhanced visualization and data-logging capabilities.
- Pressure sensor replacement: Replace outdated or damaged pressure sensors with new, high-precision sensors calibrated appropriately and integrated with the control system, ensuring accurate pressure measurement and monitoring throughout the injection and extrusion process.
- Temperature sensor replacement: Install new temperature sensors that provide accurate and reliable measurements. These sensors should be compatible with the control system and HMI, allowing for real-time monitoring and control of temperature during the injection and extrusion process.
- Feed screw replacement: Inspect the feed screws for wear, damage, or reduced efficiency. Replace them with new, high-performance screws designed for optimal material mixing and flow. Ensure proper alignment and installation to minimize wear and improve overall machine performance.
- Lubrication and maintenance: Lubricate all moving parts and replace worn-out seals or gaskets. Perform routine maintenance tasks such as filter changes and cleaning to ensure the machine operates smoothly.
- Reassembly: Reassemble the machine, ensuring all components are correctly installed and aligned. Double-check connections and wiring to ensure proper communication between sensors, control systems, and the HMI.
- Testing and calibration: Power the machine on and conduct a series of tests to verify proper function and performance. Calibrate the control system, sensors, and HMI to ensure accurate readings and control.
With these core steps, you can successfully recondition a plastic injection mold or extrusion machine, ensuring it operates efficiently and reliably for years.


