Showing posts with label Micro-Measurements. Show all posts

Optimizing PCB Testing with the Latest 3-Element Stacked Rosette Strain Gauge Technology

Optimizing PCB Testing with the Latest 3-Element Stacked Rosette Strain Gauge Technology

As the demand for thinner, smaller, and more densely populated PCBs increases, Micro-Measurements' new G1350A perfectly fits the bill for evaluating PCBs' stress. Thanks to the flex circuit and pre-attached lead wires, it features a compact design and significantly simplifies the installation process.

A stacked rosette strain gauge is a particular strain gauge designed to measure the typical strains along different directions at a single point. A regular strain gauge measures the deformation or strain of a material in one direction. In contrast, a rosette strain gauge, composed of multiple strain gauges, can measure strain in multiple directions. A stacked rosette strain gauge consists of several individual strain gauges stacked on each other, each oriented in a different direction to measure the strains in various directions at a single point. The stacked rosette configuration allows for a more compact design compared to a planar rosette, where the gauges are arranged next to each other.

Usage on Printed Circuit Boards (PCBs):
  • Quality Control: During the manufacturing of PCBs, there may be internal stresses generated due to various processes such as lamination, soldering, etc. These stresses may lead to the PCB's warping, bending, or even cracking. Stacked rosette strain gauges can measure these internal strains at critical points on the PCB to ensure they are within the permissible limits.
  • Design Validation: During the design phase of PCBs, engineers use finite element analysis to model and predict the strains and stresses that the PCB will be subjected to during its operation. By attaching stacked rosette strain gauges to the prototype PCBs and subjecting them to real-world operating conditions, engineers can measure the actual strains experienced by the PCB and compare them with the predicted values from the model, helping in validating the design and making any necessary modifications before mass production.
  • Failure Analysis: When a PCB fails during operation, it is essential to understand the cause of the failure to make necessary design modifications and prevent similar failures in the future. Stacked rosette strain gauges can be attached to the PCB at locations suspected of experiencing high stresses or strains. By subjecting the PCB to the operating conditions that led to the failure, engineers can measure the strains at these critical points and determine if they were the cause of the failure.
  • Thermal Expansion Measurement: PCBs often have components that generate heat during operation, which can cause thermal expansion of the material. This thermal expansion can lead to mechanical stresses and strains on the PCB and its components. Stacked rosette strain gauges can measure these strains accurately and help design PCBs that can withstand these thermal expansions without failure.

Micro-Measurements' G1350A Features:

  • Round shaped to facilitate spot installation.
  • Minimal form factor of 5.1mm diameter.
  • Readily available resistance values: 120 ohm (C4A) + 350 ohm (C4K).
  • Flex circuit connection for the most flexible and comfortable gage installation (50mm and 300mm).
  • Pre-attached lead wires: 1m or 3m length, 2 or 3 wire configuration.
  • Highly compatible with StrainSmart® software for PCB testing application features.
AP Corp.
(508) 351-6200


Stress Analysis With the Use of Strain Gages

Stress Analysis With the Use of Strain Gages

When external loads are applied, stress analysis assesses the internal forces and stresses acting on a material or structure. Strain gages, widely used in this process, measure the deformation (or strain) that occurs when a material experiences stress. The following provides a detailed explanation of how to accomplish stress analysis using strain gages:


  1. Selecting strain gages: The first step involves choosing an appropriate strain gage for the specific application. Consider factors such as the type of strain (e.g., tensile, compressive, shear), the expected magnitude and direction of strain, temperature range, and material properties of the test specimen.
  2. Preparing the surface: Before attaching the strain gauge, clean and thoroughly prepare the test specimen's surface, using solvents, abrasives, or other cleaning methods to remove contaminants, ensuring proper strain gage adhesion to the surface.
  3. Installing strain gages: Bond the strain gage to the test specimen using a specialized adhesive. Align the gage carefully toward the expected stress, accurately positioning the gage grid (which contains the sensing elements) over the area of interest. Once the adhesive cures, the strain gage installation is complete.
  4. Wiring and instrumentation: Connect the strain gage to a data acquisition system using lead wires. This system usually includes a signal conditioner, which amplifies the small electrical output from the strain gage, and an analog-to-digital converter, converting the analog signal into digital data for further analysis.
  5. Calibrating: Calibrate the strain gage and data acquisition system before starting the stress analysis. Apply known loads or strains to the test specimen and record the corresponding output from the strain gage. Create a calibration curve relating the measured strain to the electrical output of the gage.
  6. Applying loads and collecting data: With the strain gage installed and calibrated, subject the test specimen to the desired external loads. As the sample deforms under load, the strain gage also deforms, causing a change in its electrical resistance. This change in resistance is proportional to the strain experienced by the material and can be measured and recorded by the data acquisition system.
  7. Analyzing data: Analyze the collected data to determine the stress experienced by the material. Typically, this involves comparing the measured strain to the material's known stress-strain relationship (e.g., elastic modulus). Depending on the complexity of the loading conditions, finite element analysis (FEA) or other computational methods may be employed to simulate the stress distribution within the specimen.
  8. Interpreting and concluding: Use the stress analysis results to evaluate the material's performance and assess the design's suitability for the intended application, including identifying potential failure points, assessing fatigue life, or optimizing the design to reduce stress concentrations.


In summary, stress analysis using strain gages requires selecting, installing, calibrating, applying external loads, collecting data, and analyzing the stress-strain data to understand the material's response to the applied loads.


(508) 351-6200

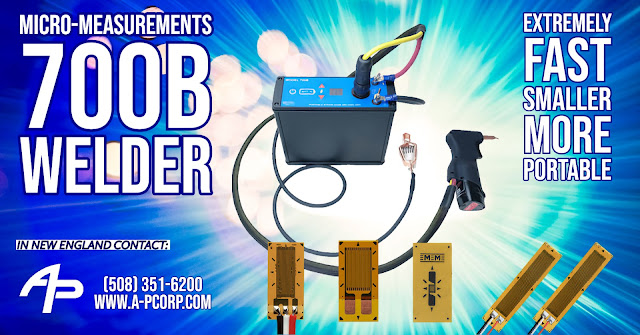
The Micro-Measurments Model 700B Next Generation Welder

Micro-Measurments Model 700B

The Micro-Measurements Model 700B Welder is the next generation of the Model 700 Welder, which has been used for decades to install tens of thousands of strain gages worldwide. This experience and customer input and support provide more capability and flexibility while remaining in a smaller, more portable package. 

This new welder combines a high-speed spot welding rate with the enhanced safety and portability features that you have come to expect from Micro-Measurements. It is designed for spot welding the Micro-Measurements line of CEA, LWK, LEA, LZN, and LZE weldable strain gages. In all types of adverse field conditions, the 7rugged 00B performs efficiently and dependably.

The 700B's use of commercially available Lithium-ion batteries, which are easily replaced in the field and can handle 1500 welds (@30 joules) on a single charge, is a significant improvement (equivalent to welding around 30 linear weldable gage). The lightweight unit weighs approximately 8.3 lb. (3.77 kg) and is ideal for field use, overcoming the main limitations of other portable spot welders on the market. The unit also welds small thermocouples and light-gauge metal  

The Model 700B enhances Micro-Measurements' broad portfolio of weldable gages suitable for all types of applications and environments. Encapsulated, sealed, and high-temperature versions of Micro-Measurements' CEA, LWK, LEA, LZN, and LZE product families are included. Weldable sensors can be easily installed in field applications under a wide range of weather conditions because they are spot-welded rather than adhesively bonded." 

The Model 700B's welding energy can be easily adjusted by the user from 10 to 60 Joules, with a weld rate of up to 60 welds per minute, making it one of the fastest tools of its kind. The 700B is simple to clip onto a harness or carry around remote job sites, whether working suspended under a structure or in a manufacturing plant. It is particularly well-suited for working from rope access, aerial lifts, or in a laboratory setting. ​

For more information in New England, contact AP Corp. Call (508) 351-6200 or visit https://a-pcorp.com.

Micro-Measurements Strain Gage Instrumentation Catalog

Strain Gage Instrumentation

Explore Micro-Measurements complete catalog of data acquisition instruments.

Micro-Measurements offers a comprehensive range of specialty instruments for data acquisition. With Micro-Measurements instruments, you can capture fully corrected, accurate engineering-unit data with minimal effort. Their special-purpose equipment, backed by highly skilled engineers' expertise and knowledge, complements strain gage installation integrity and instrument calibration.

DOWNLOAD THE CATALOG HERE

Product Range:

  • High-speed data loggers
  • Single-channel devices
  • Portable indicators
  • Multi-channel data acquisitions systems
  • High-bandwidth signal conditioners
  • Signal conditioning amplifiers
  • Embedded analog-to-digital convertors
  • Inputs for other commonly used sensors, including load cells, displacement transducers, thermocouples, and accelerometers. 
For more information about Micro-Measurements in New England and Upstate NY, contact AP Corp. Call them at (508) 351-6200 or visit their website at https://a-pcorp.com.

What is a Binocular Strain Gauge Load Cell?


Load cells, the heart of weighing systems, are mechanical devices that use strain gages to provide a measurable electrical output which is proportional to the force applied. The electrical output can be either an analog voltage or current output, or a digital on/off output.

Used for tension, compression, and or shear measurement, load cells are packaged and oriented to perform in testing equipment, electronic scales, and monitoring systems. Tension load cells are used for measuring forces that are in-line and "pull apart". Compression load cells are used to measure forces that are in-line and "push together". Shear load cells are used to measure tension or compression forces that are offset (not in-line). When selecting load cells, there are many form factors or packages to choose from to insure their physical size is compatible with space available for the application, such as inside an electronic weighing scale.

The strain gage is a resistive sensor whose resistance changes based upon the applied strain. A strain gage is attached to some structure, and when that structure is deformed (tension, compression, shear), the resistive strands in the strain gage follow the structure deformation, causing an electrical resistance change. This change in resistance is converted to units of strain or stress. 

Strain gages are used in transducers that measure force, pressure, and tension, and are often used providing stress analysis in structures such as airplanes, cars, machines, and bridges. 

When specifying strain gages one must consider the application variables, such as operating temperature, the state of the strain (including gradient, direction, magnitude, and time dependence), and the stability required by the application.

For more information about strain gages and load cells, contact AP Corp. Call them at 508-351-6200 or visit their web site at https://a-pcorp.com.

Bonding Strain Gages? 5 Steps to Getting Surface Prep Right!


When bonding Micro-Measurements Advanced Sensors Technology strain gage sensors (CEA, C4A, C5K)  you want to ensure an excellent bond. The key element in bonding strain gages is surface preparation.

The video above demonstrates specific procedures and techniques with proven advantages. By precisely following these carefully developed instructions (along with the requisite procedures for gage and adhesive handling), the result will be strong and stable bonds. This video presents a procedure that is simple to learn, easy to perform, and reproducible. Keep in mind, it is very important to pay attention to detail and follow the instructions precisely. The importance of surface preparation for strain gage bonding cannot be understated.

1) Degreasing

Rigorously  degrease the gaging area with a good solvent, such as CSM Degreaser or GC-6 Isopropyl Alcohol. Be aware though that some materials (e.g., titanium and many plastics) react with strong solvents. Make sure your solvents do not contain any contaminants

2) Abrading

Preliminary dry abrading with 220 or 320-grit silicon-carbide paper is generally required if there is any surface scale or oxide. Final abrading is done by using 320-grit silicon-carbide paper on surfaces thoroughly wetted with M-Prep Conditioner A; this is followed by wiping dry with a gauze sponge. Repeat this wet abrading process with 400-grit silicon-carbide paper, then dry by slowly wiping through with a gauze sponge.  Finish with 320 grit on most steels and 400 grit on aluminum alloys.

3) Burnishing of Layout Lines

Using a 4H pencil (on aluminum) or a ballpoint pen (on steel), burnish (do not scribe) whatever alignment marks are needed on the specimen.


4) Conditioning

Repeatedly apply M-Prep Conditioner A and scrub with cotton-tipped applicators until a clean tip is no longer discolored. Remove all residue and Conditioner by again slowly wiping through with a gauze sponge. Never allow any solution to dry on the surface because this invariably leaves a contaminating film and reduces chances of a good bond.

5) Neutralizing

Now apply a liberal amount of M-Prep Neutralizer 5A and scrub with a cotton-tipped applicator. With a single, slow wiping motion of a gauze sponge starting within the clean area and wiping outward in one direction.  Repeat the wiping step with a clean gauze pad, again, start in the clean area, wipe though the gage location moving outward in a single stroke to fully dry this surface. Do not wipe back and forth because this may allow contaminants to be redeposited.

For proper outcomes, the procedures and techniques presented here should be used with qualified installation accessory products from Micro-Measurements, namely:
  • CSM Degreaser or GC-6 Isopropyl Alcohol
  • Silicon Carbide Paper
  • M-Prep Conditioner A
  • M-Prep Neutralizer 5A
  • GSP-1 Gauze Sponges
  • CSP-1 Cotton Applicators
  • PCT Gage Installation Tape
For more infomration, contact AP Corp. Call them at 508-351-6200 or visit their web site at https://a-pcorp.com.

Strain Gage Sensors with Pre-attached Lead Wires


The following is from the podcast "StrainBlog" (https://www.strainblog.com) about exciting new technology for adding lead wires to strain gages. The discussion between hosts Jim and Darryl is about the development and virtues of the new Advanced Sensors Technology C4A and C5K strain gages.

AP Corp.
508-351-6200

For Strain Gage Users Who Hate to Solder - New Strain Gage Sensors with Pre-attached Leads

Strain Gage Sensors with Pre-attached Leads

The following is the transcript from the podcast "StrainBlog" (https://www.strainblog.com) about exciting new technology for adding lead wires to strain gages. The discussion between hosts Jim and Darryl is about the development and virtues of the new Advanced Sensors Technology C4A and C5K strain gages.


Jim - The topic that keeps coming up repetitively is gauges with pre-attached lead wires. I got a myriad of customers looking for a variety of different solutions. Everything from printed circuit boards, where we've got to route very fine lead wires from gauges to data acquisition systems;  civil engineering projects where they're looking for low cost, long cable lengths, sometimes two wires, sometimes three wire. There seem to be more and more demands - what are we doing to meet this variety of applications that we sort of lump into this category of pre-leaded strain gages?

Darryl - Jim, that's a fantastic question. So, we've got this new line of strain gages we call C4A's [from Micro-Measurements], and they they're available in a bunch of different sizes. We go down right now to about a 0.062" gage length, and we go up to a 0.235" gage length. We put a two conductor and a three conductor wire on it on. We can vary the length of that, and these gages are actually made using our new technology from the Advanced Sensors Group, where we can really push the limits now both on the size of the strain gage as well as the resistance. We're really excited about these. We're targeting different markets, including structural testing, as well as printed circuit board testing. There's also another one that we've recently introduced, which is a C5K version, and that's a three element rosette, a planar style that's in a 350 Ohm resistance, and with this new technology, we can make this gauge smaller, more compact than ever before, and it really makes it ideal for printed circuit board testing, where you're trying to get up close to the components that's on that board, so that you could get very accurate, localized strain gage measurements.

Jim - Now, I think I've seen one of the C5K gages that you refer to, and that's a remarkably small planar gage. If I'm correct, the footprint of that planar gage is even smaller than the smallest stacked rosette that we've ever made. Is that true?

Darryl - Yeah, you're absolutely right. So, one of the smallest stacked rosettes we've had is the 031WW as well as the G1350, and this new planar gage will actually fit within the footprint of both of those gages. The active gauge length is less than 0.020 of an inch, and we also pre-attach three conductor, 36 gauge wire to each one of those grids, so basically, you have a planar rosette with 10 feet of three conductor Teflon insulated wire that's 36 gauge in size.

Jim - Well that seems to solve a lot of problems. With stacked rosette that you have a lot of self heating issues, trying to dissipate the heat from those three layers, down to a single plane and dissipate that. With the planar rosette, all gauges air on the single plane - you don't have a proximity issue with height of sight from the neutral axis,  you don't have that heat build up, and if I remember correctly, these are actually 350 Ohm gages, not 120.

Darryl - That's absolutely right. You hit the nail on the head. These are 350 Ohm gages, so you don't have to be as concerned about self heating effects, because of the higher resistance, and also because it's a planar, and like you mentioned, there's not as much of a superposition error because that's a planar gage and not a stack one. So there should be less correction due to bending and also less concern related to excitation and self-heating of the strain gage. We're really excited about adding this to our portfolio of strain gauges that customers can use now to do this printed circuit board type testing.

Jim - And that coupled with the fine wires solves a wire routing issue, getting those leads out from between components out of the package to the data acquisition system. Sounds like a perfect solution to me.

Darryl - Yeah, we're really excited about.

For more information on strain gage sensors with pre-attached leads in New England or Upstate New York, contact AP Corp. by calling (508) 351-6200 or visit their website at https://a-pcorp.com.