Supply Chain Reliability for Pressure Sensors

Supply Chain Reliability for Pressure Sensors

Massive disruptions to global supply networks began with the global pandemic in March 2020. The troubles swiftly expanded to worldwide manufacturing, particularly those products requiring silicon chips, semiconductors, and other digital and electronic components. Pressure sensor producers, for example, are experiencing extraordinarily long lead times on all sensors due to the supply chain issue. 

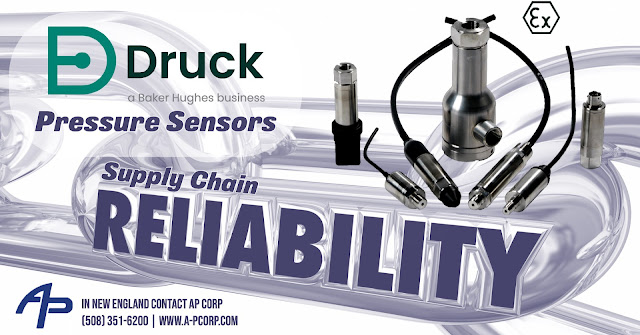
Despite global chip scarcity and the impact of supply chain restrictions, Druck has continuously expanded its production capacity to satisfy explosive demand for its pressure sensors.

The UNIK 5000 is a high-performance configurable solution to pressure measurement employing modular design and lean manufacturing techniques. Based on micro-machined silicon technology and analog circuitry, the combination enables best-in-class performance for stability, low power, and frequency response. The UNIK 5000 platform allows you to quickly build up your sensor to match your precise needs and configure a specific solution to your pressure measurement requirements. Lead times for the UNIK 5000 are still maintained at 3-4 weeks! 

For more information about Druck products in New England, contact AP Corp.
(508) 351-6200


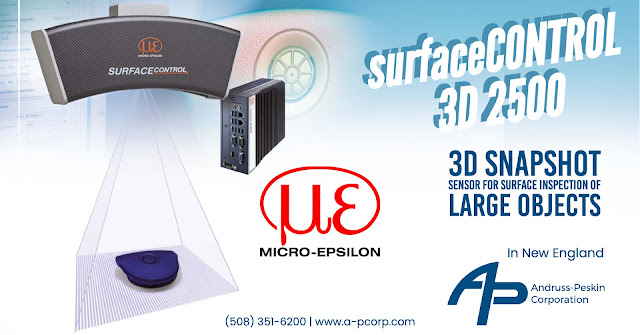
The surfaceCONTROL 3D 2500 Snapshot Sensor for Surface Inspection of Large Objects

surfaceCONTROL 3D 2500

The Micro-Epsilon surfaceCONTROL 3D sensor is ideally suited to the automated inline inspection of geometry, shapes, and surfaces on diffuse reflecting surfaces. The 3D snapshot sensors work according to the fringe projection principle, which allows direct 3D measurement of components. The sensor includes a large measuring field and a high measuring range depth with z-axis repeatability of up to 3.0 μm. Three models cover different measuring areas. 

Captured images transfer to the external SC2500 controller and are processed quickly into 3D data via the Gigabit Ethernet interfaces. The 2D/3D Gateway II supports EtherNet/IP, PROFINET, and EtherCAT connections. 3DInspect, DefMap3D, and Inspection Tools are powerful software tools that enable precise 3D measurements and surface inspection. GigE Vision compatibility also allows easy integration into third-party image processing software. The comprehensive SDK for customer software integration rounds off the software package.

surfaceCONTROL 3D Sensor Features:

  • Large objects max. 650 x 495 mm
  • High measuring range depth up to 300 mm
  • Acquisition time from 0.5 s
  • Highest precision up to 3.0 μm
  • Digital interfaces (via controller 2500): GigE Vision/GenICam
  • Digital interfaces (via 2D/3D gateway): Gigabit Ethernet (GigE Vision / GenICam) / USB2.0 / PROFINET / EtherCAT / EtherNet/IP 

surfaceCONTROL 3D Sensor Application Examples:

  • 3D inspection of geometry, shape detection and surface inspection
  • Automation, production and process monitoring as well as quality control
  • Non-contact measurement of diffuse reflective surfaces in the Stop&Go process
  • Shape, position and surface inspection
For more information about Micro-Epsilon Products in New England contact:
AP Corp.
(508) 351-6200


Free Expert Webinar on Induction Brazing and Soldering June 29, 2022 11 AM Eastern

Free Expert Webinar on Induction Brazing and Soldering June 29, 2022 11 AM Eastern

Ambrell Induction Heating Solutions, a world leader in induction heating technology,  has an important upcoming PRO Skills webinar:
  • Induction Brazing and Soldering
  • Wednesday, June 29th at 11:00 AM Eastern Time

PRESENTER: Dr. Girish Dahake, Sr. Vice President of Global Applications

Dr. Dahakeone is one of the world’s foremost induction scientists. His webinars draw hundreds of attendees per event and they come from countries across the globe.

Each webinar is designed to provide helpful, relevant content about induction heating.  The webinars are approximately 1 hour in length and are followed by an interactive Q&A session with Dr. Dahake, which typically lasts about 30 minutes.

REGISTER NOW FOR THIS FREE WEBINAR!

Commissioning a Dynisco Pressure Sensor Using the Dynisco 1490 Panel Indicator


Polymer manufacturing equipment such as extruders and injection molding machines are outfitted with various sensors, which allow the operators to monitor process variables, maintain safety, and avoid downtime and product output.

Dynisco manufactures precise pressure measurement and control devices that allow operators to monitor process variables, maintain safety, and avoid downtime during product output. This video will demonstrate each step of the pressure sensor commissioning process, including unpacking and wiring the sensor and setting parameter requirements for system operation.

For over 60 years, Dynisco has provided precision pressure measurement and control devices for all manner of plastic manufacturing equipment, which end-users rely on.

This video will teach you how to commission a pressure sensor with a Dynisco model 1490 indication device. The technician will offer guidance through each step of the pressure sensor commissioning process, from taking the sensor out of the box to wiring the sensor with the instrument and finally setting the parameter requirements for system operation.

This Video Covers:
  • Introduction
  • Unpacking and Examining the Pressure Sensor
  • Selecting the Cable Assembly
  • Unpacking and Wiring the Instrument
  • Connecting the Sensor Cable Assembly to the Instrument
  • Connecting the Cable Assembly to the Pressure Sensor
  • Supplying Power and Setting Parameters on the Instrument
  • Calibration of the Pressure Sensor with Instrumentation 

For more information about Dynisco products in New England and Upstate New York contact:
AP Corp.
(508) 351-6200

Understanding Load Cell Overload

Load Cell Overload

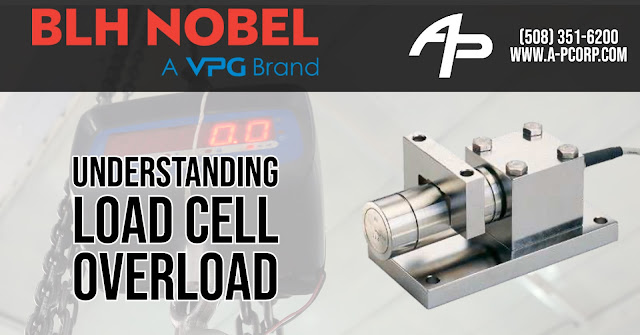
When you're talking about load cells in process weighing, what does safe and ultimate overload mean, and how strong are load cells?


The ultimate strength relates to the function as a load cell and not the mechanical strength. The mechanical strength of the load cell is even higher. 


For a load cell, there is generally three capacity limits:  


The nominal capacity of one 100%: Let's say we have a 100-pound load cell. This is the limit or capacity of the load cell. Note the load cell should not be subjected to higher forces under regular use. If the application needs to measure higher loads, then a larger load cell should be used.


The safe load usually is 200 percent of the rated capacity: Let's say with the 100-pound load cell this would be 200 pounds. If the load cell is occasionally subjected to more than 100 percent but less than 200 percent, nothing happens to it, and it will work. If repeatedly subjected to more than 100%, the load cell can be damaged due to fatigue.


The ultimate load is usually 300 percent of rated capacity or 300 pounds for a 100-pound load cell. If the load cell is occasionally subjected to a load greater than 200 percent but less than 300 percent, the load cell will be subjected to a zero shift. However, in most cases, the load cell can be recalibrated and repaired. If subjected to more than 300 percent, the bonding of the strain gauges will most likely be damaged beyond repair. The function of the load cell is damaged, and it should be scrapped. 


As a reminder, this refers to the function as a load cell and not the mechanical part. The mechanical strength of a load cell varies but is often in the range of 400 to 1 000 percent. It should also be noted that there's a fatigue limit for a load cell that generally is 133 of capacity.